


 Couple of days later, same thing, only this time, when I'd had enough, I moved on to fitting the 'new' speedo that Mr Pres (who incidentally, I should really call Mr Immediate Past Pres) sourced for me. Removed the headlight, ripped the sticky tape off the top of the nacelle (it was covering the hole where the speedo should go), removing a goodly amount of paint, cleaned the remaining sticky stuff and flaking paint off, rubbed it down and wiped clean with my favourite cleaning product, old petrol. Up on the top shelf, hidden away at the back was a pot of...wait for it...begins with H....yep, Hammerite. Smooth Black. Popped the lid off, it's still liquid, found a brush....lunch time! Followed by work time. Woe is me.
Next day, decided not to waste more time on the brakes, and it's too cold to paint - wouldn't want to have a bloom effect on my concors machine - so I take to cleaning one or two Terrier bits. I can't resist, I've got to try and undo the sludge trap in the flywheel. It's peened over to stop it from coming undone, so I un-peen it in a slightly amateurish way, but it works, and try the easy route first, just a large flat screw driver. It don't budge. Mrs BC lends a hand to hold the whole thing steady while I put all my weight behind it. It still don't budge. Back to cleaning then. So come Friday morning, I still don't have a bike ready for the Large Lunch, which was today (Saturday) but I've given up on that now and am more focused on that dratted sludge trap.

A few words of advice from someone point me in the direct of the impact driver - good idea but it still doesn't have any effect. Oh well, it the worst comes to the worst, I'll bundle it up and take it to the Large Lunch...at least I'll have part of a bike there... So at this juncture, I still haven't sorted Cubbie's brakes, or painted the nacelle, or fitted the speedo, or emptied Terry's sludge trap...but I should add that there is some positive news...but you'll have to wait a bit for that, busy day on the farm today with tail ringing and a poorly lamb born last night, then guess what, I've got to go to work. Huh.
SATURDAY - time for the Large Lunch, a good excuse for a get-together, eating and catching up after winter. And you know what that means...a gathering of men who know far more about bikes and working on them than I do. So I packed the flywheel thing into a box with rags, screwdrivers, hammers and the impact driver and popped it in the car. As Mrs BC and I arrived at the Sheiling Tor in Fyvie, some riders had just left on Bob P's treasure hunt style ride, and other were just returning, so I grabbed a few of them and lured them to the box of Terrier bits. First up was Andrew M but despite all his efforts, the sludge trap held firm. Next to give it a go was Bob P, but no joy there either, and then a team effort from Maurice C and Graham McC, with backup from onlookers Huey & Dewey forced the blighter to give in. A few good wallops on the impact driver and the screw loosened to reveal a pile of solid sludge, as predicted by everyone I'd asked if this was really necessary. Thanks guys, I would never have got that undone on my own.


Went to work on the way home from Lunch so no time to finish the job, but managed to sneak a bit of time back in the shed yesterday (Sunday, gee, this is confusing) before going to work, and picked away at the sludge, using a drill bit at first to wind the muck out and downwards, away from the big end, followed by an assortment of cable ties, plastic pointy things and a fine Allen key that was the only thing long enough to reach to the top. Then came my favourite bit; out with the GBC Red Plastic Flywheel Assy Washing Device, a turkey baster and some old petrol (old as in bought before the prices went sky high and not as in 'dirty'). The first rinse was shockingly filthy dirty and bitty, with a load of grit being washed out. Using clean petrol each time I rinsed and rinsed until it ran clear and free of debris, let it dry and then smothered it in fresh, new oil, before wrapping the whole thing up in a clean carrier bag and returning it to the shelf. Job done. (Thank you Larry for doing that research on sludge traps - just needed some muscles!)


A couple more rinses with the turkey baster and all that grit was gone.
Sunday was a very productive day, as not only did I do all that, but it was so hot that the Hammerite was at the right temperature and the nacelle didn't feel like a block of ice to touch, so after a lick o' paint, lick o' paint, Cubbie's looking a bit brighter and smarter. Trouble is, I'll have to do the other bits that need a lick o' paint now. Botheration!

Apologies for the really weird layout, I just can't get the pics to stay where I put them! Grrrrr!
PPS thanks to Gordon from Shetland the search for pics of Islay is over. Sounds like an interesting project that's on the go, update you later.


10 comments:
Sounds like an average day in my shed....
Haave you tried some heat on the flywheel to see about loosening up the sludge trap?
Or some penetrating fluid/diesel to soak into the threads? Pour some on and let it soak for a few days, give it a go to see if it works and then repeat if needed until it loosens.
sounds like the brake linings are too thick !that wont give the brake cam the right angle to arm angle. it will also reduce the brake efficiency if the linings are too thick.
so dont file the square bit lol
I guess you've already checked this but ...
if the brake arm is flat steel and you flip it over so what was the side nearest the brake plate is now facing outwards, do you get a different choice of a pair of 90 degree positions?
Failing that file four more notches inside the square so that you get an eight-pointed star shape.
Graham B
Having never worked on cubs, I went to the Tiger Cub Forum and see you have been there. If it is anything like the bigger Triumphs, you have to take a small bit and drill out the center punch mark. Then you can undo the plug.Usually easier said than done. Better check with your local experts. I have no idea what the "plug" looks like on a Cub...on the bigger bikes after the plug was out you had to extract the trap tube...which was a whole 'nother adventure...from reading on the forum it sounds like a different kinda animal... Hairy Larry
Did some more searching...still haven't found any pics of Cubbie/Terry type sludge trapperoos. But, did find that these days there are really nice Hex socket-headed trap plugs for Triumph twin owners available. In the wrenchin' days we made our own special tools for removing twin trap-tubes. Part of the tool was a Harley Davidson rod bearing roller ground just right to engage the hole in the tube and assist in carefully removing said item. Hmmmm, are there filter add-on kits for Triumph and BSA singles...anyone? Curious Larry
Got it Bodge, I just wasn't strong enough!
Hi Mark, good to have you on the blog. Don't file the square bit...don't file the square bit...hmmm...ok...
GB - I should try that - haven't done so yet cos I couldn't see how it would work but when you explain it like that, it makes sense - will give it a go tomorrow.
Larry, the Tiger Cub Forum is my second home! Thanks for taking the time to search around for info
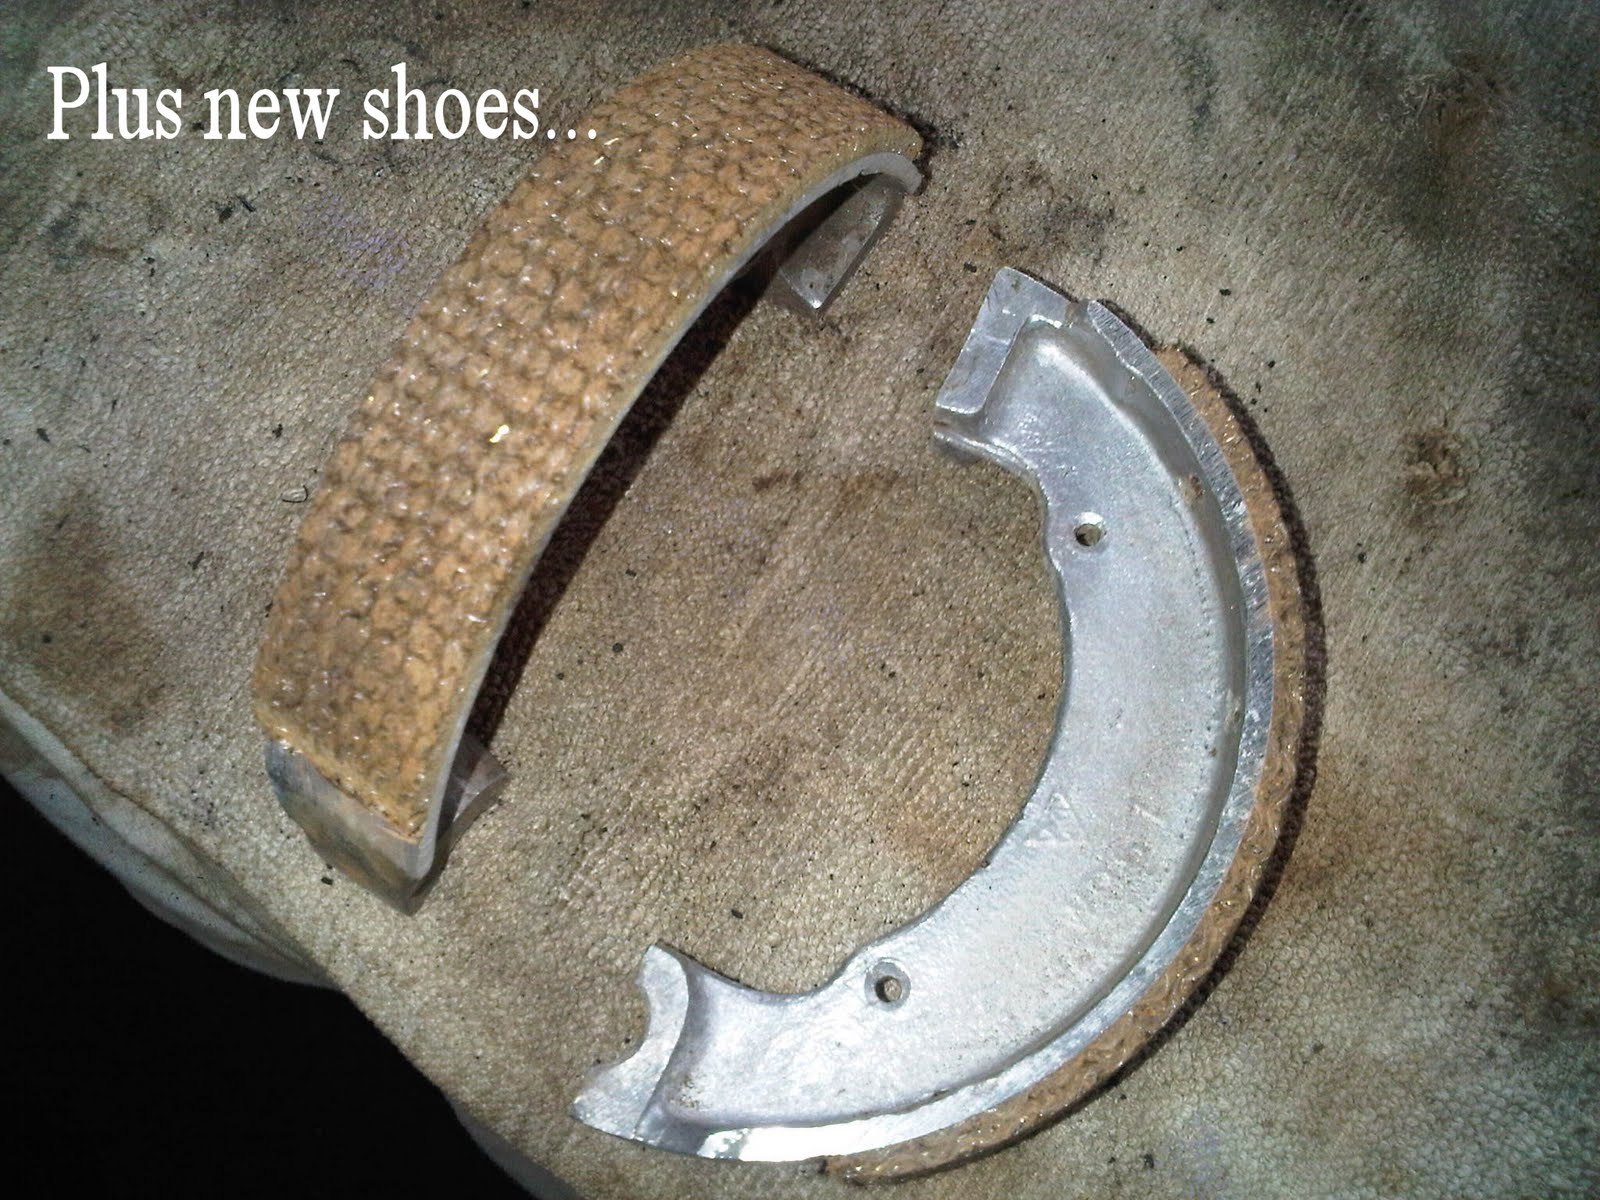
Great photos GBC.
It looks like the sides of the square in the brake arm are not quite in line with the line between its centres so it might just give you the right angle if flipped over.
The wobbly bit - looks like it may be a cylinder clamped round the fork leg by the brake anchor nut? If loose on the fork leg, you could gently prise the clamp open (not so much as to distort it, slide it off the fork leg. Then wrap some thin sheet metal round the leg (uncrinkled section of a baked bean can might do if nothing else is available), slide the clamp back on and hopefully it'll tighten up on the fork leg now. Grease or better still waxoyl whatever you put under the clamp so it doesn't rust. Looks like clamp needs to slide down the leg a couple of mm to get the brake anchor stud to go fully into the clamp's slot?
Bit worried about the thread on the brake cam that holds the arm on. Not sure if it's a blurred photo but the thread looks close to stripped?
Graham B
GB, its just the bad pic. Will investigate the wobbly bit, no idea how its fixed on to be honest, but I have a collection of bits of bean / tuna cans just for that very kind of job.
We have 32...do I hear 33? WELL,GBC I've been jumping through Googlehoops, and verifying odd non-sensical words...phewwwww! I really shoudn't do this stuff while half awake. More coffee!
So,if Robert isn't Mrs BC's brother, who is he?
Post a Comment